LINE DRAINS
An easy and safe result - every time
PROTECTIVE FOIL
No more concrete residue or mortar in the drain unit
Scan the QR code on the foil for instructions
Previous slide
Next slide
LINE DRAINS
An easy and safe result - every time
PROTECTIVE FOIL
No more concrete residue or mortar during the installation
Previous slide
Next slide

LEARN MORE

linjeafloeb professional 6 faa at

Concept & Principle

Unidrain’s floor drain is placed right up against one wall, which means that there only needs to be a fall from one side.

Patented flanges in the wall and floor provides a waterproof transition between the floor, the drain and the wall.

linjeafloeb professional 6 faa at

Choose the Right Drain Unit

Unidrain offers drain units with the exact measurements for your project.

linjeafloeb professional 6 faa at

All types of constructions

Unidrain’s floor drain is tested and approved for use in all types of constructions – whether these are heavy concrete structures or light wooden floor joist structures. 

You can download detailed construction guidelines below. 

linjeafloeb professional 6 faa at

Securing the Wet Room

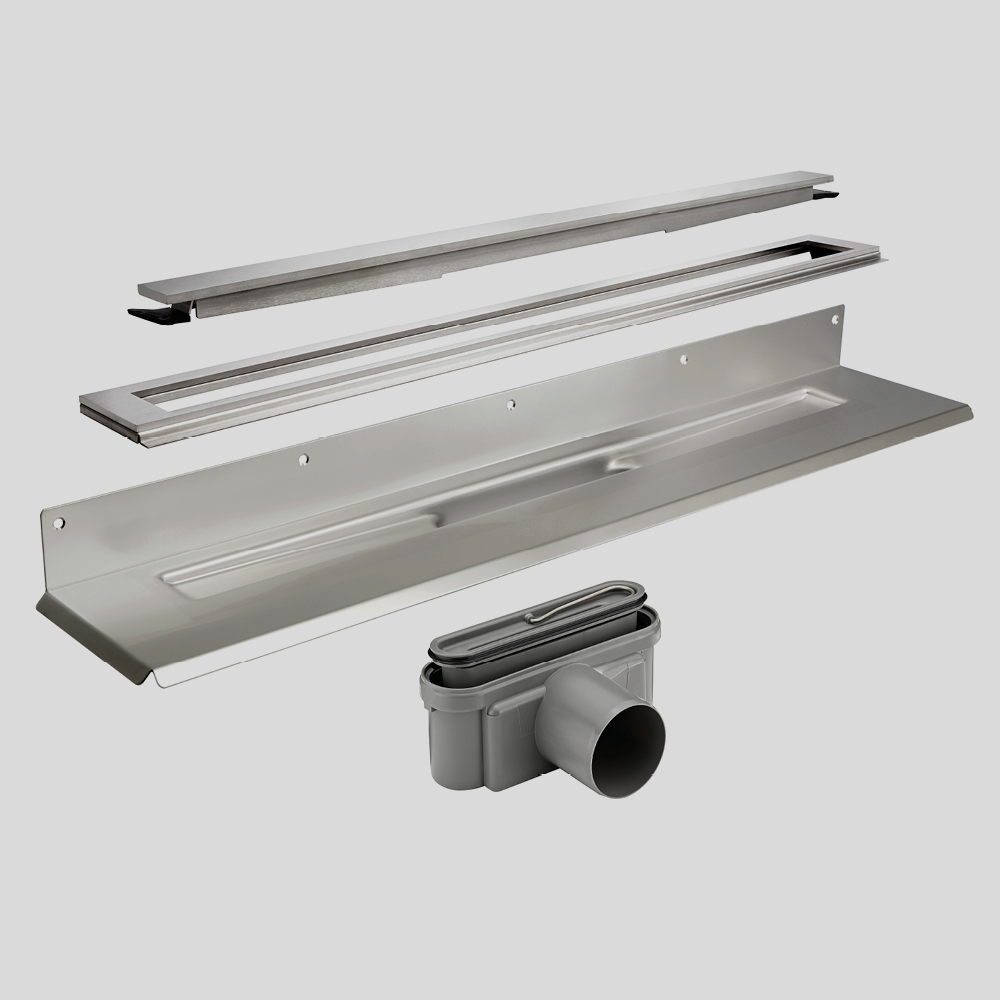
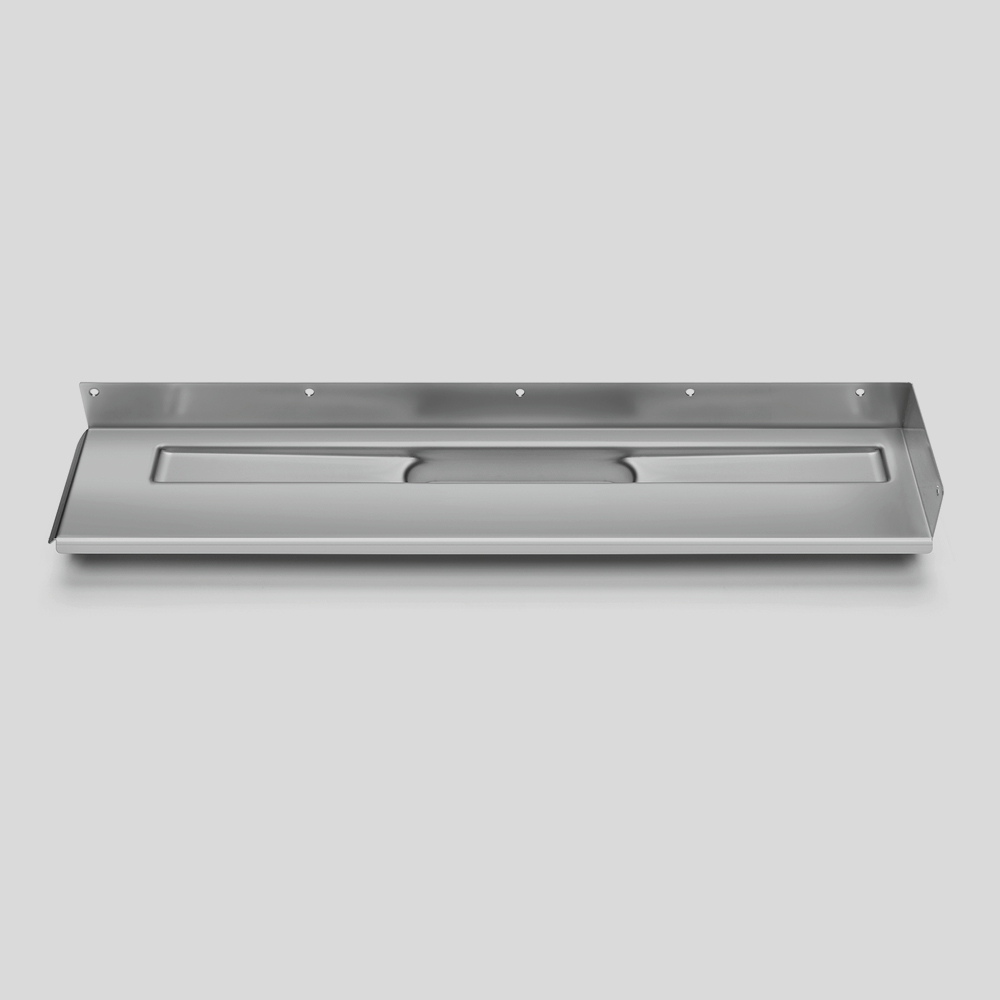
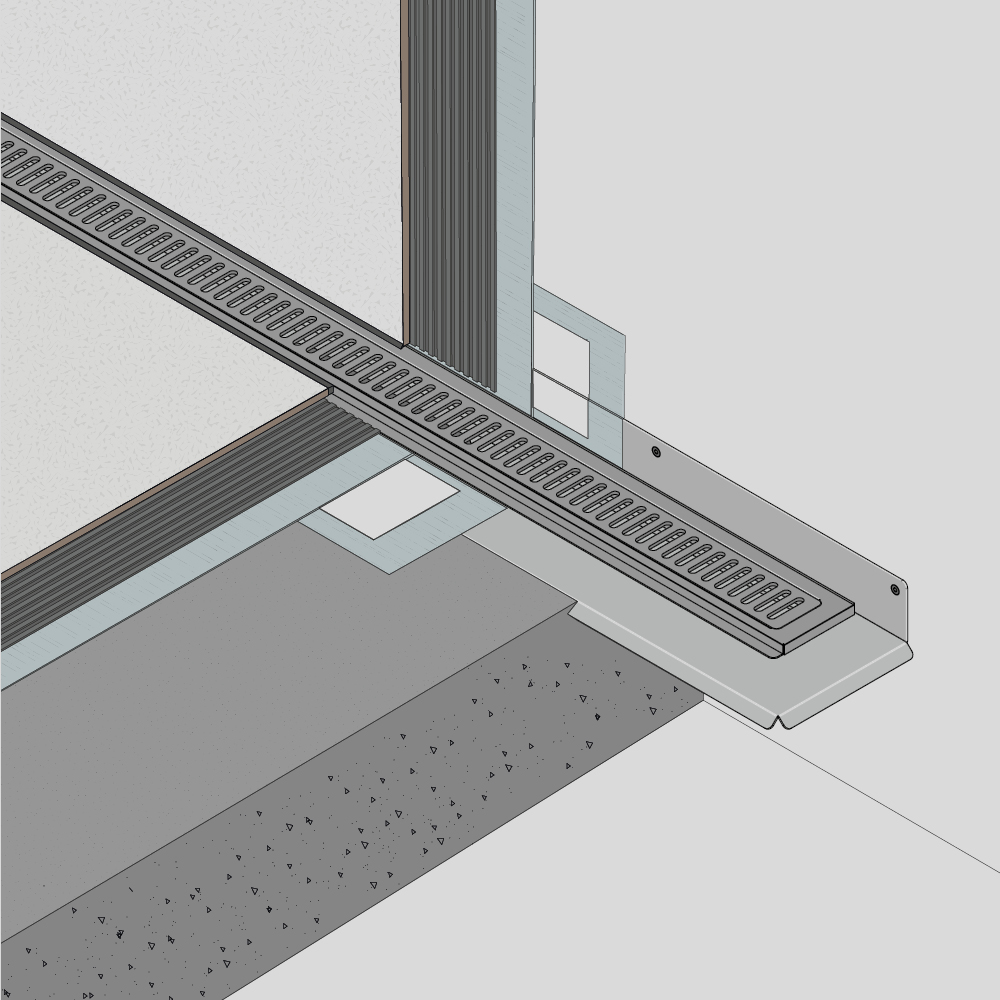
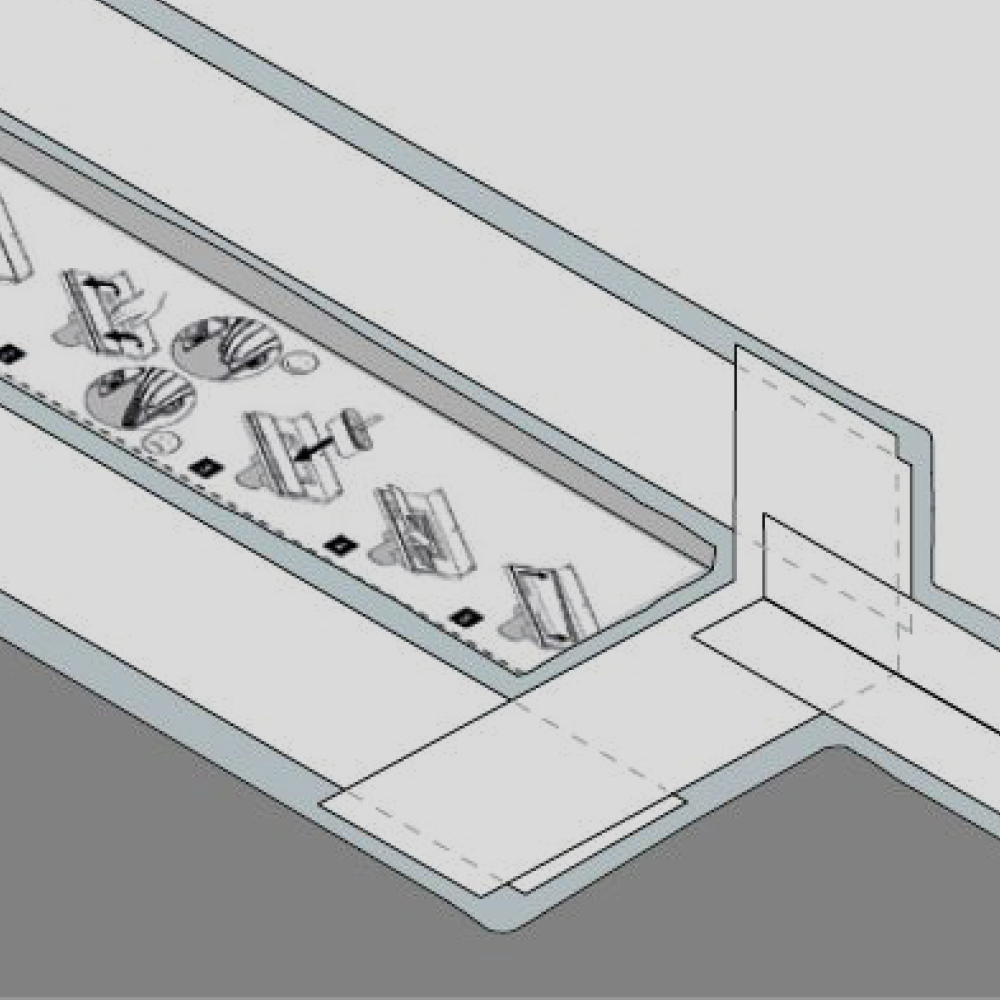
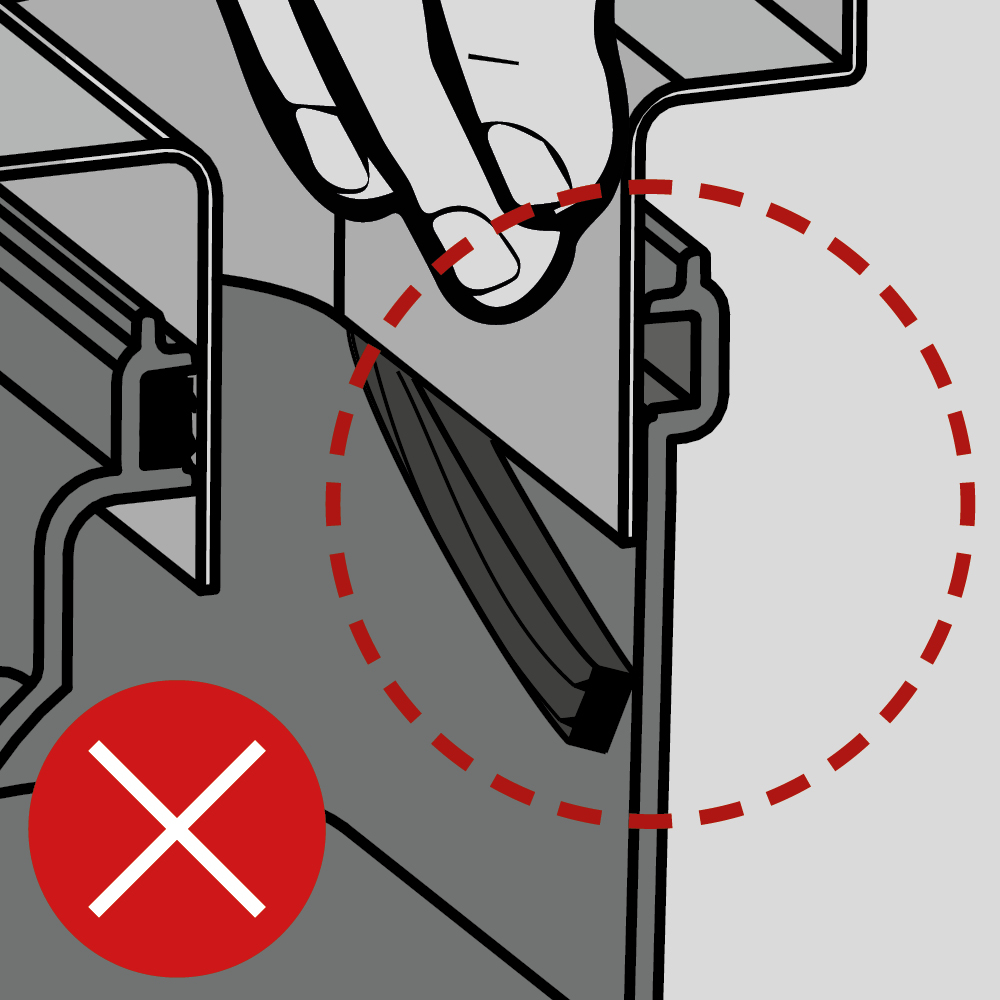
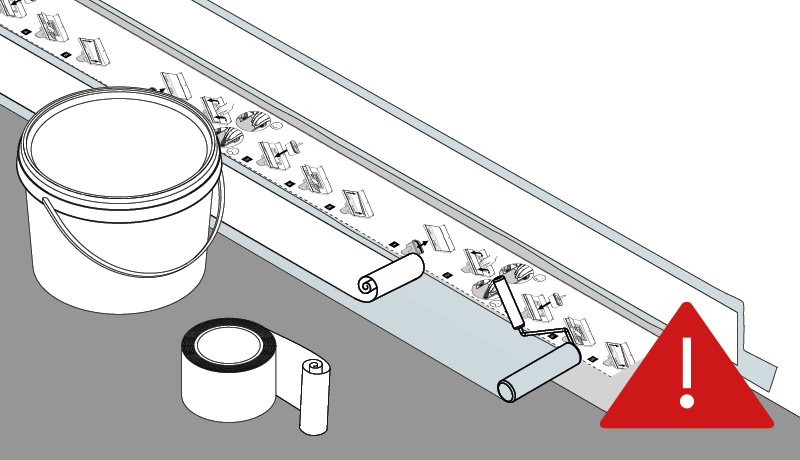
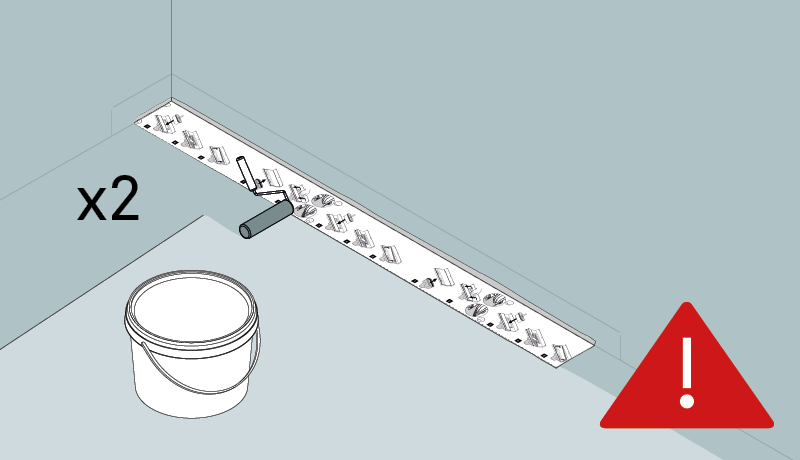
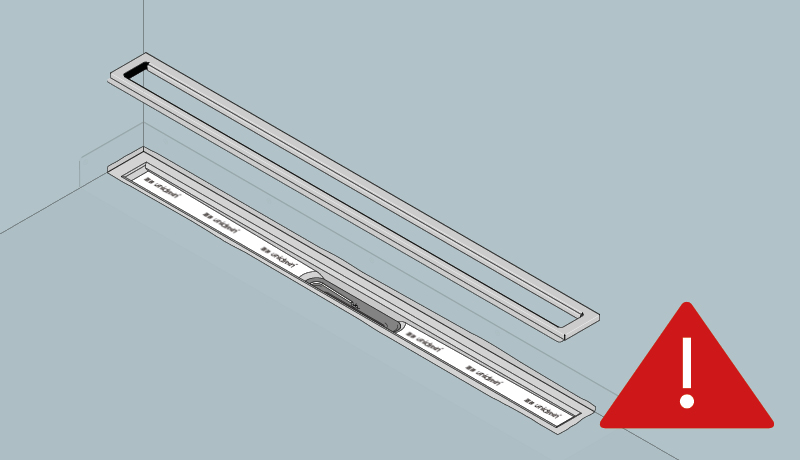
 If a wet room is not properly secured, it can lead to damage to adjacent constructions.
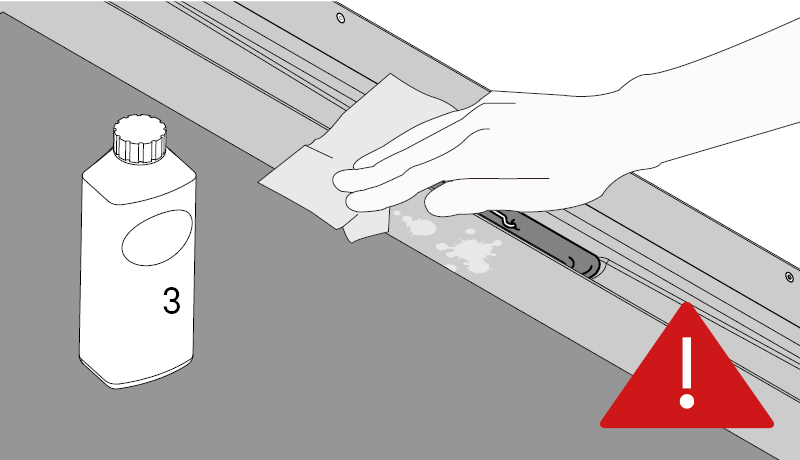
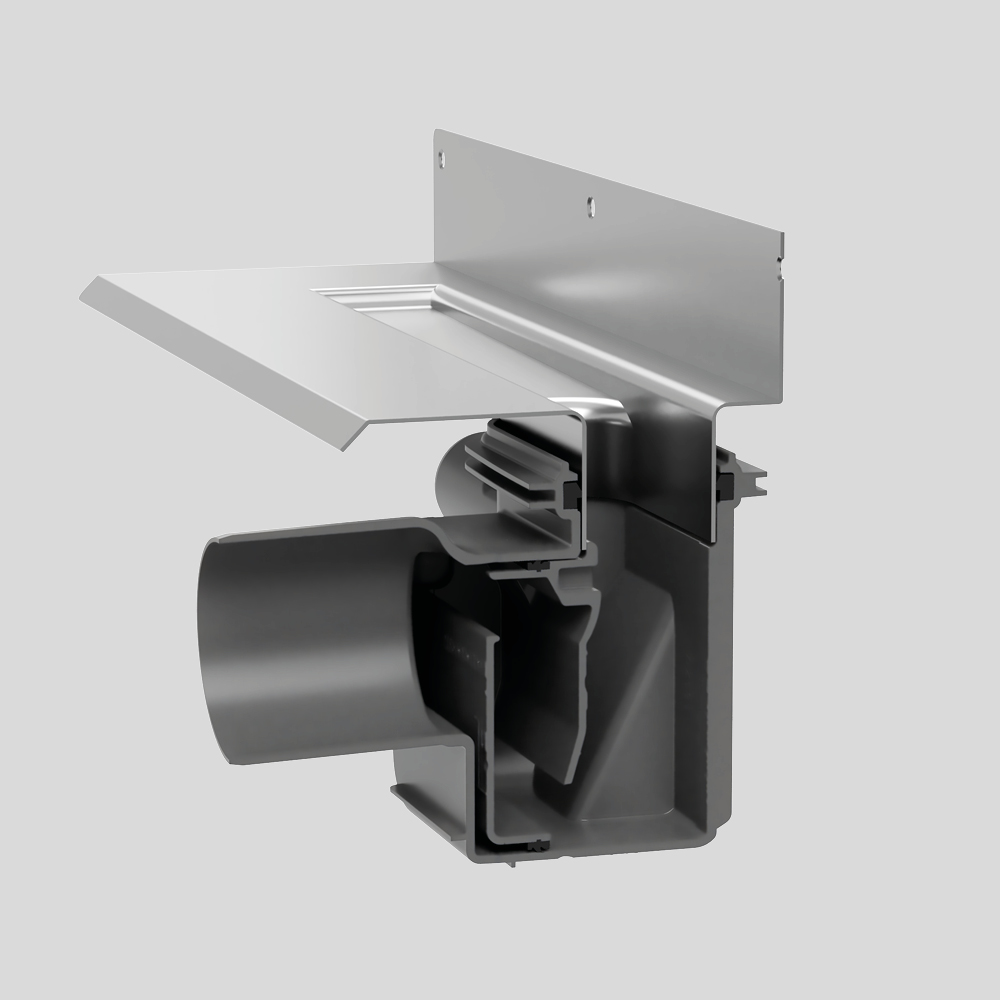
We have collected six tips for securing the wet room.  

linjeafloeb professional 6 faa at

Piping Practice

A good piping practice helps ensure a safe and secure result that lasts for many years. 

linjeafloeb professional 6 faa at

Watch The Latest Video Tip

The bathroom is the most exposed room in the house and even small mistakes can be very costly. Check out our tips to avoid the most common mistakes.

UNIDRAIN HAS TWO DESIGN series

ClassicLine
A Classic Solution

The line drain with the classic grating in brushed stainless steel is Unidrain’s original invention. A required frame holds the grating in place and provides a smooth transition.

The ClassicLine series consists of four different designs, which means there’s a solution for everyone.

Choose Between four ClassicLine Grates

HighLine
An Exclusive Solution

The exclusive design range HighLine gives the bathroom an extraordinarily stylish look. The classic grating has been replaced with a brushed steel panel, and an air gap ensures that the water is led away. 

The HighLine range also includes the discreet Custom-solution, in which a cut tile similar to the surrounding tiled floor is affixed to create an almost invisible drain.

HighLine has even been developed into the HighLine Colour range. Here the frame and the panel have been developed so that they can match the other metal details in the bathroom.

HighLine Colour comes in hand-polished steel, as well as PVD-treated brass, copper and black.

Concept and Principles

A floor drain is designed to divert water away from the shower area. The surrounding floor needs to have the correct fall towards the drain. If the fall is not sufficient – or even worse, if it slopes the wrong way – there is a risk of gaps and leakage, which can cause expensive damage to the building over the years.

linjeafloeb professional ide og

Patented Flanges

linjeafloeb professional ide og

4 parts - 1 Drain

Before Unidrain came onto the market, there was only the square floor drain in the middle of the shower area, requiring a correct fall from four sides. The square drain therefore complicates laying the floor and subsequent tiling. The solution to this problem was the basic idea behind Unidrain.

Unidrain's floor drain is placed right up against one wall, which means that there only needs to be a fall from one side. And Unidrain’s patented flanges in the wall and floor provide a waterproof transition between the floor drain, the floor and the wall.

With Unidrain, one product provides a technical, simple and smart solution to the two typical sources of damage from floor drains: The wrong slope and leakage.

Unidrain’s original idea and subsequent expansion of the product range have been thoroughly tested and meet all the standard requirements.

CHOOSE THE RIGHT DRAIN UNIT

There are many options for putting together a floor drain. Therefore, we have gathered a large selection of drain units that suit all types of projects, whether you want to place the drain against the wall or use it as a free-standing solution.

You can achieve exactly the look you want with a stylish drain grating from the ClassicLine range or a panel from the HighLine range. Floor drains can also be ordered with customised dimensions.

Line Drains Against the Wall

1001 - Drain Unit With Three Wall Flanges

For shower cubicle with three permanet walls.

1002 - Drain Unit With Two Wall Flanges

For shower cubicle with open right side, glass screen or similar.

1003 - Drain Unit With Two Wall Flanges

For shower cubicle with open left side, glass screen or similar.

1004 - Drain Unit - Rear Flange

Can be freely positioned against rear wall, independent of any side walls.

1004 - Rear Flange with side outlet

Right drain.

Can be freely positioned against rear wall, independent of any side walls.

For use with ClassicLine only. 

1004 - Rear Flange - with side outlet

Left drain.

Can be freely positioned against rear wall, independent of any side walls.

For use with ClassicLine only.

1004 - Drain Unit With an Extra Deep Rear Flange for Thick Tiles 6-20 mm

Can be freely positioned against rear wall, independent of any side walls.

The rear flange is set 6 mm back, so it can be used with 20 mm wall tiles + tile adhesive and wet room membrane. 

Only for HighLine Custom frameless.

1004 - Drain Unit With an Extra Deep Rear Flange for Thick Tiles 15-20 mm

Can be freely positioned against rear wall, independent of any side walls.

The rear flange is set 12 mm back, so it can be used with 20 mm wall tiles + tile adhesive and wet room membrane. 

ClassicLine or HighLine frame must be used.

Free-Standing Drain Units

3004 - Drain Unit - Free-Standing

For shower cubicle with no permanent walls.

4004 - Drain Unit - Vinyl

For shower cubicle with no fixed walls. 

The vinyl set comprises a magnetic fitting, frame and grating. Special grating in Column design. 

See technical tips and tricks

Wet Room Tips

vadrums

Tip no. 1

Follow the detailed instructions from the wet room membrane supplier (Lip, Ardex/Wedi, Alfix, Schönox/Sika, Mira, Knauf, Mapei and others).

vadrums

Tip no. 2

Avoid using wet concrete primer on the metal surfaces of the line drain before applying the wet room membrane.

vadrums

Tip no. 3

Remove any dirt and grease stains from the drain’s metal surfaces before starting work with the wet room membrane.

vadrums

Tip no. 4

The membrane’s overlap on the drain’s metal surfaces must be at least 40 mm.

vadrums

Tip no. 5

A liquid one-component wet room membrane must be applied in two layers, with a total layer thickness of at least 1 mm.
vadrums

Tip no. 6

It is important to be thorough with the wet room membrane – it is the waterproofing of the drain that makes the whole shower installation last for many years. 

Guide to Your Floor Construction

Unidrain is suitable for all floor constructions. You can find the installation guide for your construction below.

Concrete

Concrete on Steel Sheet Construction

Reinforced Calcium Board Construction